Fuchsia Ombre Lip

Love Colorful_Fuschia Ombre Lip_0001
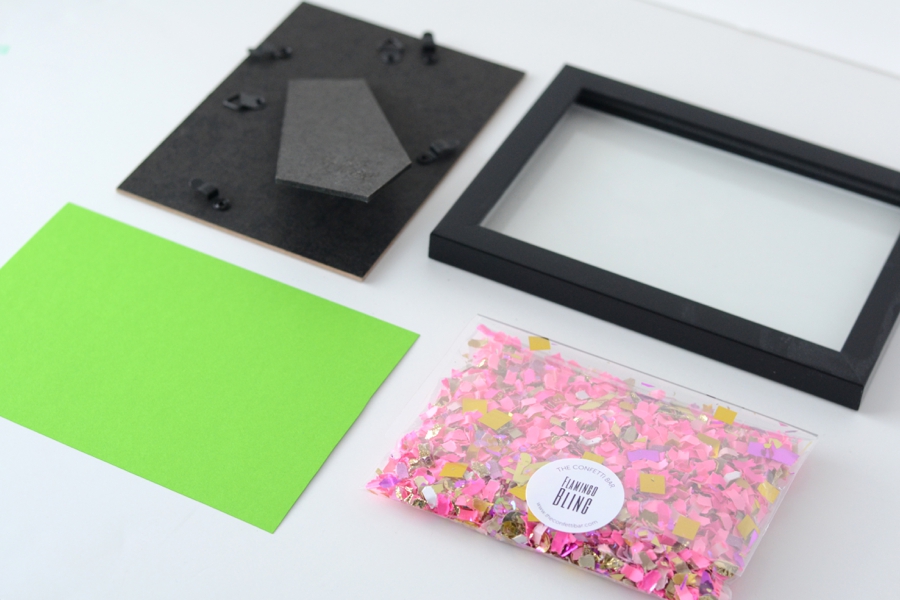
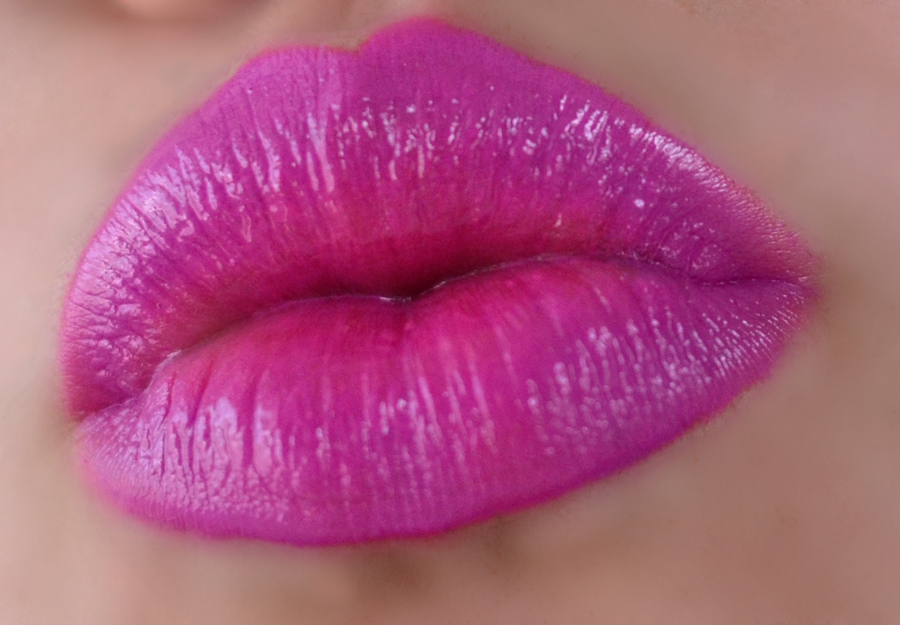
Man oh man…I do love me a good colorful lip color. And this one is just the ticket! A subtle fuchsia/ magenta/ radiant orchid ombre that is perfect for those times when you’re feeling a little bold. Here’s what you’ll need:

Love Colorful_Fuschia Ombre Lip_0002
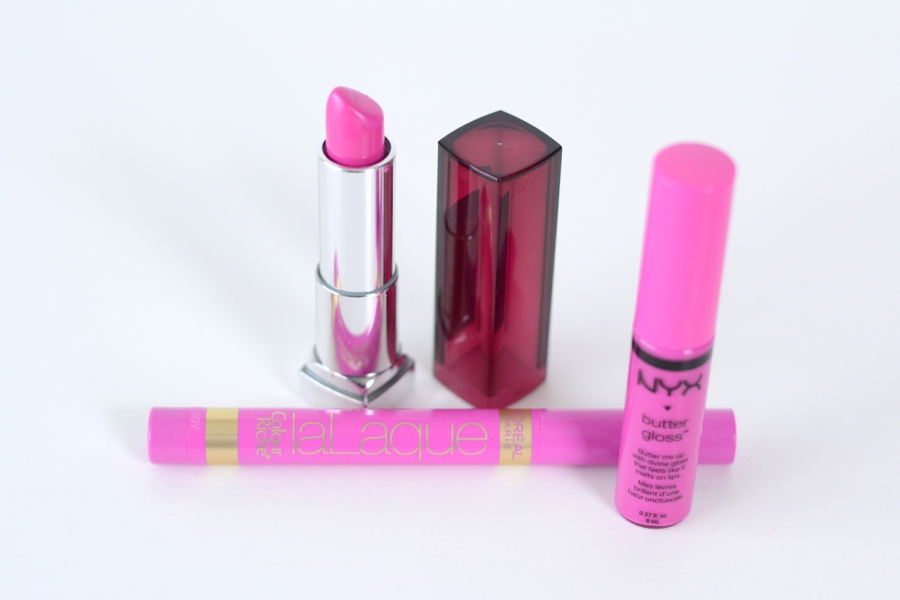
Maybelline lipstick in the shade 990 – Fuchsia Fierce* | L’Oreal La Laque in the shade 412 – Lacquer-ized* | NYX Butter Gloss in the shade BLG19 – Sugar Cookie*

Start by using the lipstick for all-over lip color, then line your lips with a slightly darker shade, carefully blending the color out towards the center of your lips. “Pat” your lips together to further blend the colors, and top with a gloss to smooth it all out.

*I realize some of these products may be difficult to find in certain areas or they were limited/special edition, but even if you can’t find these exact shades, something similar will always work! It can also be fun to experiment with different color combos.

Did you give this a try? Share your pics on Instagram  and use the hashtag #livelovecolorful


DIY Confetti Frames

So most of you know I’ve been keeping pretty busy over at The Confetti Bar, so while I work on building up a better Love Colorful, I thought I’d bring you an easy little DIY.

Love Colorful_Confetti Frames_0004Looking for a bold, colorful piece of home or office decor? What could be better than a bunch of pretty little frames filled with fun confetti?

Love Colorful_Confetti Frames_0001To start you’ll need a picture frame, piece of paper/card stock in the same size, and some confetti!

Love Colorful_Confetti Frames_0002Turn the frame upside down, with the glass still in place. Pour some confetti in, and flatten down to fill the frame. (How much confetti you use will depend on the size of your frame and how “full” you’d like it to appear.) Place your piece of paper over the confetti, and replace the frame backing. (You may have to push down to flatten some of the confetti pieces and get the frame to close!)

Love Colorful_Confetti Frames_0006Ta-da! It’s that easy to make such a statement piece!

Love Colorful_Confetti Frames_0003

Love Colorful_Confetti Frames_0005You can get all sorts of crazy with mixing up confetti colors and background patterns. Try glitter paper in a coordinating (or contrasting!) color, or maybe even a funky pattern. And custom confetti? Well that will just make things a whole lot more fun!

Imagine a whole gallery wall filled with these beauties in all different colors and sizes. Now that would be a real party.


DIY Mini Glitter Hangers (and a collab with Pearls & Pastries)

Love Colorful_DIY Mini Glitter Hangers_0008So I’m not sure if you guys know about Lauren from Pearls & Pastries, but she is the brilliant & sparkly mind behind the sequin hanger. Now being that I tend to work on a slightly smaller scale, I decided to bring you an easy DIY for making your own mini, glittery hangers out of paper clips!

Now I don’t know about you, but I have always been obsessed with miniature things. One of my favorite books as a kid (that I still have!) was Tiny Treasures from American Girl.

71KGD33BMML._SX258_BO1,204,203,200_

I originally saw this post from Agus Yornet on Pinterest, and immediately thought of Lauren’s hangers and the book. So I decided to take this project idea and jazz it up a bit ;) The instructions are pretty visual & self-explanatory.

Love Colorful_DIY Mini Glitter Hangers_0001 Love Colorful_DIY Mini Glitter Hangers_0002 Love Colorful_DIY Mini Glitter Hangers_0003 Love Colorful_DIY Mini Glitter Hangers_0004For a more stable version you can leave the bottom “bar” of the hanger intact, but if you want to go a step further, you can clip it off to make a more classic hanger.

Love Colorful_DIY Mini Glitter Hangers_0005 Love Colorful_DIY Mini Glitter Hangers_0006

Love Colorful_DIY Mini Glitter Hangers_0007As a way to display my new little hangers, I added a bit of wire into a picture frame and hung all my little hangers across.

Love Colorful_DIY Mini Glitter Hangers_0008And of course a miniature, sparkly little hanger needs a cute little tulle skirt to go with it! I just took a small elastic band and wrapped some tulle strips around it.

Love Colorful_DIY Mini Glitter Hangers_0012

Love Colorful_DIY Mini Glitter Hangers_0009 Love Colorful_DIY Mini Glitter Hangers_0010 Love Colorful_DIY Mini Glitter Hangers_0011As an added little bonus, Lauren and I have teamed up to bring you a limited edition set, complete with mini sequin hanger confetti I made, and one of Lauren’s Sparkle hanger prints!

il_570xN.555291294_c17z

Be sure to go here and grab yours, as there are very limited quantities!

DIY Ornament Earrings

Love Colorful_DIY Ornament Earrings_0004

Want to make some quick, colorful holiday earrings? I’ve got you covered!

Love Colorful_DIY Ornament Earrings_0001 Love Colorful_DIY Ornament Earrings_0002

Love Colorful_DIY Ornament Earrings_0003To make these cute little confetti-filled baubles, simply get some small clear ornaments (I found mine at Michael’s Craft Store), an assortment of small confetti pieces (or even glitter!), earring wires, and a pair of pliers. Remove the ornament cap and fill each orb with confetti/glitter. Put the cap back on, and attach an earring hook using the pliers. Ta-da!

Love Colorful_DIY Ornament Earrings_0005 Love Colorful_DIY Ornament Earrings_0006 Love Colorful_DIY Ornament Earrings_0007Now your face can be just as festive as any Christmas tree! ;)


I Quit My Job to Make Confetti

Well friends, I have some exciting (albeit slightly terrifying) news to share with you: two weeks ago I gave notice at my full time job to take a real shot at working for myself, and am now a self-employed confetti-maker/crafter extraordinaire!

Jessica_The Confetti Bar_0001

For those of you who may not know, over the summer I launched my online confetti shop, The Confetti Bar, and I am happy to report that it is doing better than I ever could have hoped in such a short period of time.  It has gotten to the point where I can barely keep up with orders on nights & weekends alone, so my family and I figured it’s time to give things a go full time.

I have always dreamed of starting my own business, and despite being extremely nervous, terrified, anxious, & overwhelmed, I’m also extremely happy, excited, eager, & enthusiastic and think this will be the best thing I’ve ever done. Even if it fails miserably, at least I can say I tried, right?

This also means I will have more time to get back to more posts and projects on this poor, neglected little blog, so double yay for that too!

Stay tuned for more good things to come, but in the meantime I encourage all of you to take the first steps toward doing something you always dreamed of. If I can do it, anyone can. :)