Get the Look – Neutral Pink Shimmer

Hello lovelies!

I know I have been waayyy MIA lately, but that is only because I’ve been hard at work with a little confetti shop I opened.  Don’t worry, though – I’m back today with something new! I thought you guys might enjoy some periodic makeup inspiration / tutorials, so I bring to you my first one ever, a neutral / pink shimmery look using the Too Faced Naked Eye Palette. (After all, it’s fun playing with colors on your face, too! :) )

(**Below are the products I used to create this look, but feel free to substitute products, brands, and shades to suit your taste! Also I did not get paid to promote any of these products – they are simply some things I have bought personally and like to play with. All products contain affiliated links, meaning you won’t pay anything extra, but I may get a small percentage of any purchases made so I can continue to buy pretty, sparkly, & colorful things to make & share fun projects with you!)

Love Colorful_Makeup Look 1_0001

 Prime

Love Colorful_Makeup Look 1_0003

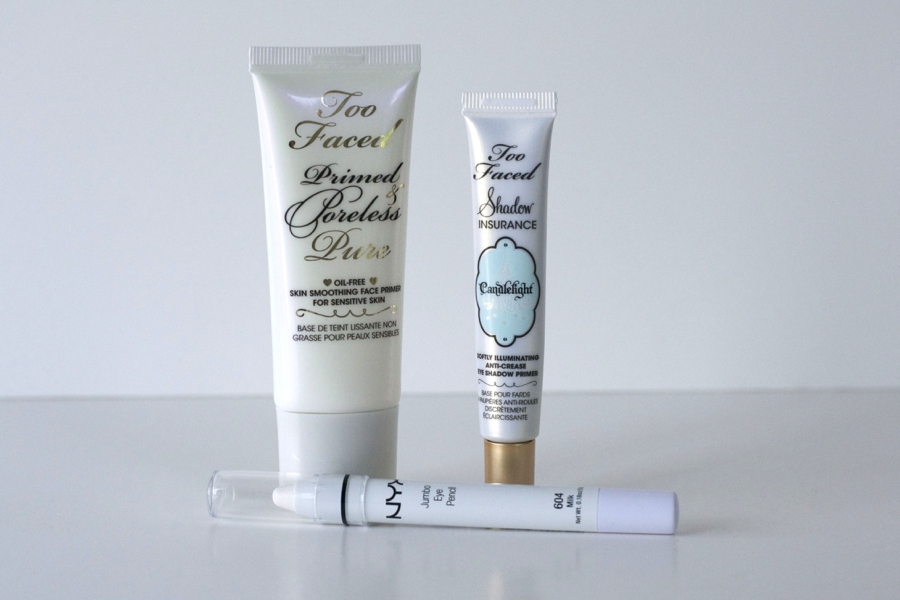
After moisturizing, prime your face using Too Faced’s Primed, Poreless, & Pure.  Then use their Shadow Insurance in Candlelight to prime your eyelids.  I then also like to go over that with my NYX Jumbo Eye Pencil in Milk (only on the lid) so the color of my eyeshadow stands out a little more.

Eyes

Love Colorful_Makeup Look 1_0004

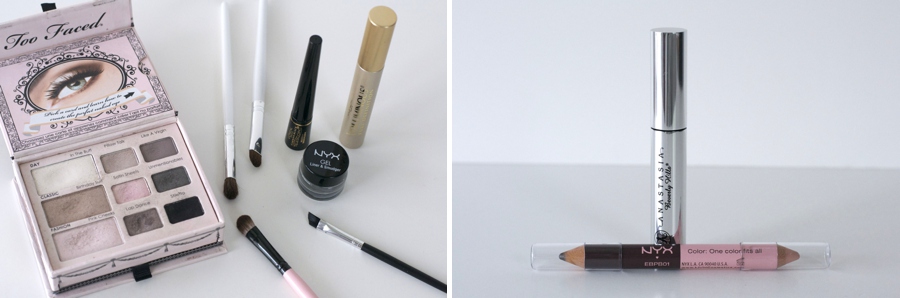
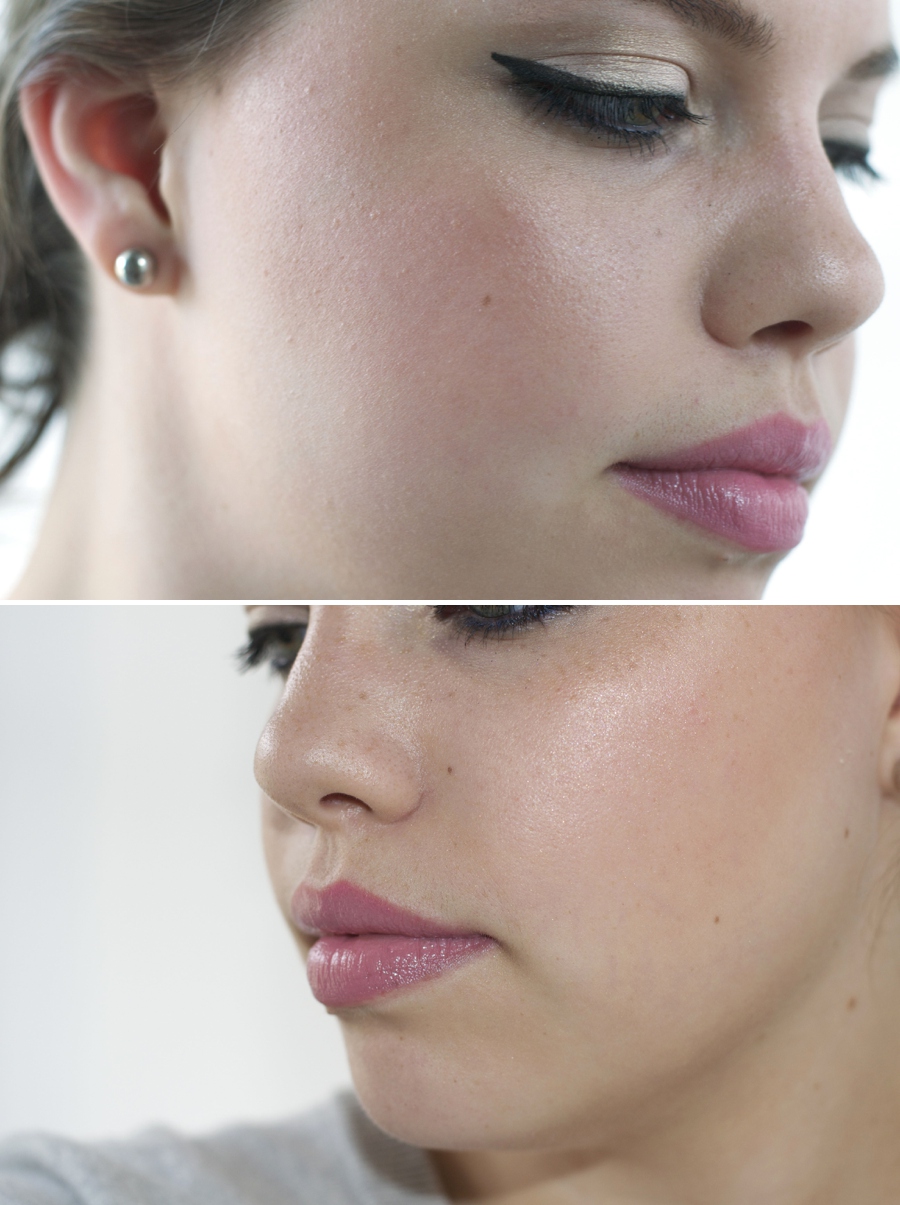
Then go in with the Too Faced Naked Eye Palette, using the middle row (“Classic” look).  Add ‘Birthday Suit’ (light brown) from your brow blending down into the crease.  Use ‘Satin Sheets’ all over the lid, and ‘Unmentionables’ to line your upper and lower lids.  Go in with black eyeliner to create a winged look. I like to use both L’Orèal’s Telescopic liner in Carbon Black and NYX gel liner in Jet Black with an angled brush.

Then for eyebrows use the NYX “Push-Up Bra For Your Eyebrow” pencil – use the brow pencil side (which is a universal shade) to fill in your brows and use the highlighter side for under your arch and the inner corner of your eyes.

Finish off with L’Orèal’s Voluminous Full Definition mascara in Blackest Black.

Face

Love Colorful_Makeup Look 1_0005

For my face I used Too Faced’s Tinted Beauty Balm in the shade Snow Glow as a foundation.  To brighten up under the eyes, use Maybelline’s Dream Lumi Touch Highlighting Concealer in the shade Ivory and set that with L’Orèal eyeshadow powder in the shade Seashell.  I also added a little of the powder in the middle of my forehead, down the bridge of my nose, and my chin (“T-zone”) to highlight.

Then go in with Benefit’s Hoola Bronzer to contour and NYX blush in the shade Dusty Rose.  You can also add a little bit of Bobbi Brown’s Shimmer Brick in the shade Pink Quartz to the top of your cheekbones and very lightly over where you highlighted with the white powder down the bridge of your nose.

Lips

Love Colorful_Makeup Look 1_0006

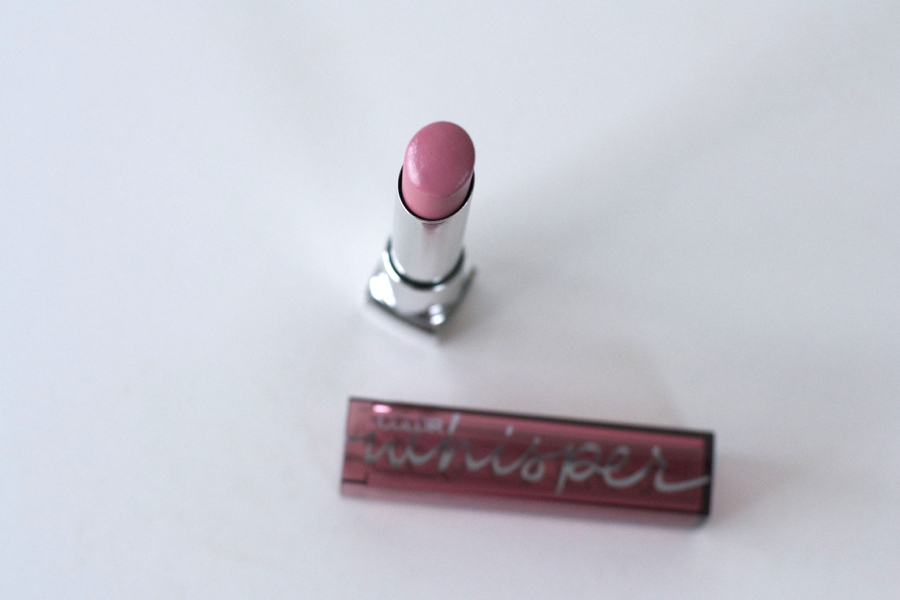
Finish off the look with Maybelline’s Color Whisper in the shade Lust for Blush on your lips.

Love Colorful_Makeup Look 1_0002I should maybe also note that I am in no way a professional makeup artist / guru, but figure if I can pull off something that looks half-way decent, anybody can! :) Youtube will be your best friend for learning even more tips & tricks!

Let me know if you’d like to see more posts like this in the future!

Painted Feather Purse

Hey everyone! Ok, so I know I’ve totally been MIA for a while, but I’ve been lost in a pretty rad confetti cloud for the past couple of months. I promise I’ve got some fun new stuff up my sleeve for you though, so fear not!

Speaking of, I’ve got a brand new DIY for you! And the good news? It’s pretty simple and pretty fast, especially if you can score a purse on clearance like I did!

LoveColorful_Painted Feather Purse_0001

I happened to find this pretty little thing at my local TJ Maxx in the clearance bin. Pretty cool, right? It’s apparently a bag by Carlos Santana, which I find a bit strange and completely amusing.  But when I saw this guy I just knew I had to do something with it.

**Even if you aren’t quite as successful finding a clean, feathered purse all ready to go, you can still achieve a similar look by getting a plain bag, cutting out some feathers from some leather (or material of choice), and sewing or hot gluing them in rows across one side of the bag. A little more work, but still pretty simple.

LoveColorful_Painted Feather Purse_0002I also happen to be in a neon phase right now, so anything bright and bold that screams NEON has my attention. Enter these paint colors. Ahh. So colorful and happy. Between this color palette and this bag, I knew I was going to go a bit tribal, inspired by the colors and patterns I’ve been seeing around lately.

LoveColorful_Painted Feather Purse_0003So basically you’re just going to grab your feathered purse, some pretty acrylic paints, a small paint brush, and go to town coming up with crazy cool embellishments for each feather.  If you’re cutting out your own feathers, you might want to paint them before sewing/gluing them onto the bag to make your life easier, but if you already have them on the bag, feel free to use some masking tape to hold back the surrounding feathers from the one you want to work on.  Since the paint is acrylic, they dry pretty fast, but you can also use a hair dryer to speed up the process a bit :)

LoveColorful_Painted Feather Purse_0004MIx & match colors and patterns until you have a bright, bold, and beautiful assortment.

LoveColorful_Painted Feather Purse_0005 LoveColorful_Painted Feather Purse_0006 LoveColorful_Painted Feather Purse_0007

LoveColorful_Painted Feather Purse_0008It’s that easy, and  just in time for summer!

Confetti is here!

Guess what guys? Confetti is finally here! *giant confetti explosions* Yay!!!

Take a moment to celebrateWe finally got my new online shop, The Confetti Bar, launched so you should go check it out and celebrate.

And always remember, when life hands you confetti, it’s time to party!

[Psst… Now until June 8th 2013 use secret password FREESHIPPING to get, well, free shipping! Pass it on.]


Sis Boom Clip Art Series: Faux Lighted Mirror

Hey everyone! I’ve got a super quick & simple project for today’s Sis Boom Clip Art Series: A Faux Lighted Mirror!

LoveColorful_Faux Lighted Mirror_0007For this project we’ll be using Sis Boom’s Glitter Garland Circles

PBEmIHbbzlpaDZBhLkcHZm4RTzJD733-g4orQKgoT0s

All you’ll need is this clip art file, some scissors, and adhesive dots.

LoveColorful_Faux Lighted Mirror_0001Start by printing out the clip art onto glossy photo paper and cutting out each circle.

LoveColorful_Faux Lighted Mirror_0002Grab some adhesive dots, adhere to the back of the circles, and start sticking! It’s as easy as that!!

LoveColorful_Faux Lighted Mirror_0005 LoveColorful_Faux Lighted Mirror_0006

LoveColorful_Faux Lighted Mirror_0004If you want your mirror to have a more “authentic” look of lights, you can choose to just use the gold glitter circles. Line the top of your mirror with the large circles to simulate vanity lights. (You can even line the bottom with the small or large dots if you want!)

LoveColorful_Faux Lighted Mirror_0003Or you can use just pink, or alternate between the two colors. They could also just be used as a decorative border around a mirror – the possibilities are endless!

Confetti is Coming!

Are you looking for the coolest confetti shop on the block? A place where you can buy lots of colorful pretties to jazz up any project or party?? A place that offers a highly visual smorgasbord of confetti amazingness???

Well then I just thought y’all might like to know I’m working on launching my new online shop, The Confetti Bar! Be sure to check out the site to sign up for notification of when the store opens! (And follow The Confetti Bar on Facebook, Twitter, and Instagram!) You guys should know how I like to send out free stuff for fans sometimes, so you never know what surprises I may have in store for you on this one!

Confetti_Is_Coming_theconfettibarP.S. How awesome is Cliffpro for coming up with this promo image? I tend to ask him for some crazy stuff, but he really knocked this one out of the park!